Archive | Door RSS feed for this section

Paint & Doors & Trim Oh My!

24 Jun

(Late late post, 3/27-ish)

The flooring has been laid and it’s time for the finishing touches! We once had some general contractor friends tell us that finishing work is most often… not finished. They were of course alluding to our naΓ―vetΓ© having our first ever contractor to skimp on us unknowingly. They ever so kindly graced us with their experience, referencing that the budget is usually exceeded by the time the little bits come, but the clients’ wad has been blown on all the in your face pretty stuff, that it’s sneakingly undone. So we hired them to do the finishing work for us and we’ve never looked at a room the same. Even the hidden pieces. Lesson learned, there is no way I will let my wad be blown until it is finished. 

   Now, let’s get that trim on so we can move all our shit out of the kitchen and returned to it’s proper place (meaning where I want it to go πŸ˜‰)! For this full house project we needed 500 feet of trim, and every foot needed to be painted! Yes, 500′!! We bought them in 12 foot pieces, making less cuts needed so to save James a few trips to and from the miter saw. Well, we couldn’t just lay that all out and do a full sweep worths of painting, so there were stages. Some of this 500′ was done previously (back in January, to be able to move into our bedroom,) when we had naked floors that didn’t care if I dripped on them, making it slightly less painful. At the time we only painted enough trim to complete the two bedrooms, and now that all our belongings have been moved in we have a bit less open space and must take caution with the paint and our flooring, get crafty Desiree. (I’m seeing a trend in my attire πŸ€”)
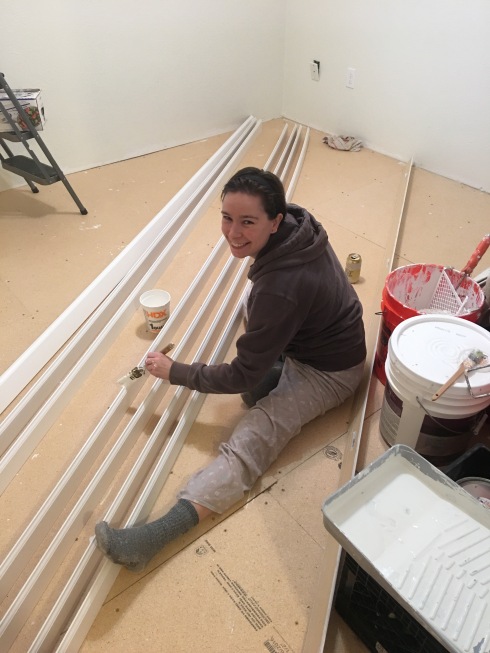
Paint. 😫 Smoosh them together for easy and quick rolling. But then, don’t forget to scooch them apart, without pushing one off of the horses they are hanging onto for dear life, to paint those little top ridges too. Wait to dry. Repeat for two more bundles. But. Nailed it! Of course we didn’t get away without a few paint samples on.. hair of, I’ll just say their initials are Lily and Beau, due to tight circumstances from having to pass under and around this tight knit space. Nail guns are fun!! It’s the little things.Now that’s a finishing touch! On to the next task. 
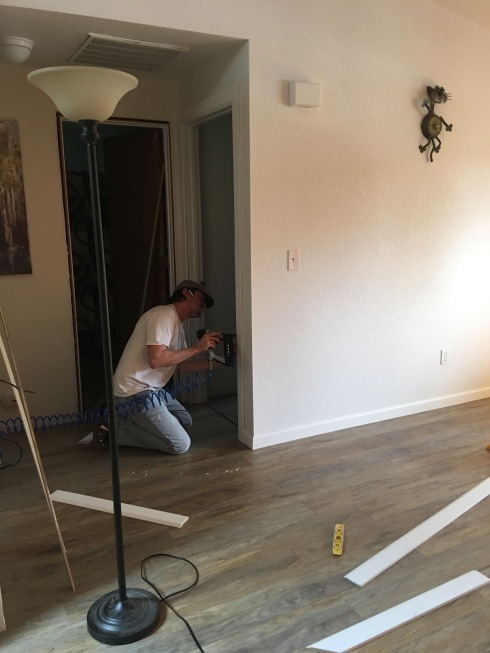
It’s time to replace all the doors, all 5 of them!! And wouldn’t ya know it, two of them had to be special ordered, the door frames were built in some random measurements that no one carries! So we decide to wait until they come in to paint, trying to get it all done in one swoop.  You all must know how tired I am of painting. Well, one of the two doors arrived and the other was going to take a few weeks so we tackled what we had and figured I’d get to the last one when it gets here. 


Hahaha!  πŸ˜” It’s been hung for a couple weeks now, chilling naked on its hinges, blue tape and all! And I talk about putting forks in it, shame!
Now that this is posted, I suppose I must finish it. Hold me accountable!! 🎨

Update 7/9.  I finally finished the door!!! Fork!! βœ”οΈ

Climbing up the DIY Ladder

24 Mar

Editor’s note; if you haven’t, or have, read these 2 previous blogs, well you don’t have to now, per say, but I highly recommend just taking a quick glimpse at the pics. It’ll help string this whole project together. 

https://wordpress.com/post/itzalllogical.wordpress.com/414

https://wordpress.com/post/itzalllogical.wordpress.com/371

As I’ve mentioned previously, most likely a few times, our path to homeownership began with having little to (leaning heavily on this), no knowledge. The amount we’ve gained is immeasurable. Our tool collection has become quite impressive, considering we started out with, I’m sure, nothing more than a few screwdrivers, a hammer, maybe a couple of those picture hanger things and measuring tape, we’ve officially come a long way! And with every project, every new piece of the puzzle there’s almost always that one tool you don’t have so you buy it out of necessity, because you can’t use just any screw, saw, drill or nail gun and so on. Nope. Nuh-uh. No way. That’s not how it works with building. Sure, you can buy the cheap version first, thinking you’ll save some money, only to replace it later with the real deal, so spend the money now and thank me later. This cycle is vicious and necessary until one day, suddenly, you need a bigger tool box, a bigger garage, with peg board and shelving Oh My!

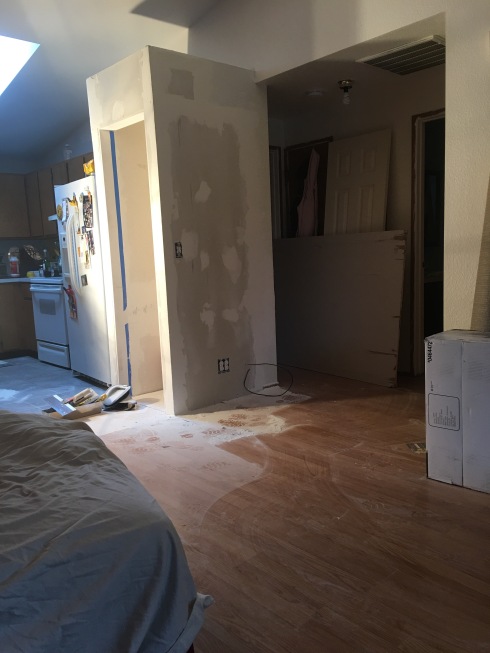
This wall/tear down/shelf building/closet project has been our biggest so far. I guess I should say James’ in the way of a start to finish, piece by piece, on his own, project. Tackling this closet, goes like this; tear down the unwanted, redirect two outlets and a switch, frame it out, drywall, mud, apply that wonderful knock down texture and install the door. Easy enough yeah? 😐

Stage 1 and 2, βœ”οΈ. I’ve basically become his assistant at this point on, hold the drywall while he cuts, hand him tools, find tools for him, ( I hear a lot of, “Babe, did you see where I put the..) and cleanup duty. Which is how I know where to locate almost anything since they are finally finding their way home!! So while I’m not needed I’m chilling. Guilty tv, writing, reading and the likes, but I get to watch him work.

Working his way around the electrical. Installing the drywall, cutting the pieces to fit the outlets just right. The way he seamlessly goes from one tool to the next, handling them with such confidence. Even when he just stands there, visualizing how he’s going to assemble the door, frame by frame, mapping it out in his head, and I gotta say, it’s sexy as fuck! πŸ˜‹ And I’ve only heard a handful of curse words followed by, “nothing a little caulk and paint can’t fix.” That’s a comforting theory to have in the back of your head at all times. 

Let’s talk about this drywall, in case you’ve never played with it. There’s the cutting and the resulting gypsum particles floating it’s fine ass as it likes, but oohhh no, that’s nothing. Next comes the mud. The application itself isn’t the worst but you can’t just scrape it on and be done, it has to dry and be sanded, (the sanding comes in handy if you’re a beginner bc it gives you room to fix what needs fixing.) It’s not just a one coat and done thing, there’s 2, maybe 3 rounds of this fun. Now that fucking dust, it settles on every damn thing. In ever corner. There’s no escaping it!! And the depths of which it travels! When the time comes for such an experience in your home, I’m sorry for your impending struggle, I offer this, only drape whatever furniture you plan on putting your feet up with that glass of wine, after you’re cleaned and showered yourself. Don’t waste your time trying to cover silly things as a bookshelf or entertainment center, it wont help. You must hide any utensils or cookware that reside the countertops, any. Tomorrow, well, cover that furniture back up! You may have to live with that horrible layer of dust for days, (unless you’re paying someone but then this blog would makes no sense) but hang in there! For every.thing.must.be.dusted! And I ain’t doing that shit more than once.
We survived the drywall and today it’s time to apply the knock down texture. The simplest breakdown, you’re shaking the hell out of the can while only pausing to spray and to scrape it down, repeat.


This is not like shaking a can of spray paint, it’s like arm day at the gym. πŸ’ͺ🏻Got it done, it dried we painted and all thats left is the door!! Well then the shelves but that’s not a worry.
We couldn’t buy a pre-hung door bc they’re all too big for the frame so James had to build it himself. Not the actual door, but the smallest they sell is still too wide for this frame. So he built in the door jamb, we had to trim about an inch off the width of the door, (thank you table saw) chisel in the grooves for door brackets, he ended up needing to shave a hair off the top as well. Door handle and catch and bam! (Hours, days and I guess a week or two later) It’s done!! (Minus the shelves)Fork βœ”οΈ